Apart from one induction last year, I was yet to explore screen printing or even produce anything screen printed.
The first step I researched was into different types of screen printing and inks:
Silk Screen
- One colour
- The use of gradients
- Metallic Inks
- Neon Inks
- Phosphorescent Inks
-Thermochromatic Inks
-Thermochromatic Inks
- Spot Varnishing
Fabric Screen
- Foiling - Different Colours
- Flocking
- Gloss Finish - Essentially transparent foiling.
Overall Process

I first had to learn the process:
1. Cleaning /stripping a screen - I learnt which chemicals are used to clean a screen, and what order to use them. One chemical is applied, then rubbed off with a water jet. Then a second is applied, and left or 10 mins, then removed. I also learnt of safety precautions taken, such as wearing a mask, headphones, and gloves.
2. Applying emulsion - I learnt of the technique to do this. It is vital to ensure the screen is pressed against the wall, so it does not slip when applying emulsion. It's also vital to make sure the emulsion is not too thick, or the image will not be exposed properly.
You should NEVER take the screen into a light room after applying emulsion, as this will expose the screen way too early. Instead, leave it to try for 20 minutes.
3. Exposing the screen - The area exposed on a black and white image is the black area. You should ask for help when exposing, unless you know exactly what you're doing. Different exposure times are given for either fabric or silk screens, as well as the stock you have printed onto to expose (light could pass through thinner paper easier, and vice versa). Make sure the exposure screen is clean before using it.


4. Washing the screen - After exposure, you need to wash the screen with water, then remove grease with washing up liquid and water. Ensure the screen is left to completely dry before screen printing.


5. Preparing for print - Use the adjustable frames on vacuum beds to position the screen correctly. Print onto the true grain to find out exactly where your print will be produced. You can then place paper under the the true grain, and mark (using tape) the corners of the paper. This allows multiple consistent prints, positioned in the same place.
Use tape to cover any areas which do not have emulsion on (such as the edges of the frame), or any defects in the screen which you would not like to print.
6. Preparing the ink - At Blenheim Walk, binder can be bought everyday at the shop between 9 am and 9.30 am. It can also be bought in the afternoon, between 1 and 1.30pm. 100g of binder costs £2, with a pot costing an extra 50p. The use of any colour acrylic is free.
You combine 2/3 binder with 1/3 acrylic. If you put more acrylic in, you could get a slightly more vivid print, however the screens may become blocked quicker. Generally, if you intend to produce a high number of prints, it's recommended to put more binder in.
6. Printing - Ensure that the true grain is NOT left under the screen, or you will just print onto that, and not the paper. Prepare your paper before getting ready to print. You pour the ink at the top of the screen, and use a squeegee to pull the ink towards you. Lift the screen, and push the ink back to where you first poured it. Doing this without lifting the screen will result in the print flooding, and putting too much ink onto the print.
7. Drying time - Generally, when left on the drying rack, prints can dry between 5 and 10 minutes.
Silk Screen - Neon Colours
I wanted to try using Neon colours, as this is something very difficult to achieve aesthetically with the use of digital print.


I wanted to try using Neon colours, as this is something very difficult to achieve aesthetically with the use of digital print.

The colours I chose to work with.

Positioning my screen in the vacuum bed. I have also taped up areas I did not want to print, including where the frame meets the screen.

I realised my screen exposed some random areas I did not want to be printed.I used tape to hide these defects.

Positioning my screen again, with the tape hiding the defects.

Printing onto true grain, in order to line up my paper underneath.

Using tape to frame the paper, to ensure consistency.

Printing the screen.

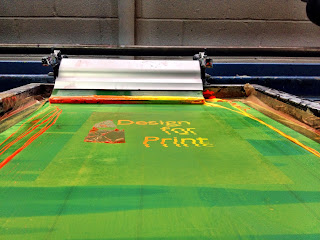
I used a combination of the two colours to produce a gradient. This is something which you have to do several times in order for you to get the gradient how you want it.

How the screen looked after printing a gradient a few times.
Images of Prints


Two Examples of the Prints produced in the separate colours.

Here I have used a gradient to combine the two colours.

A miss- print. I didn't have the screen correctly clamped, causing the ink to not come through the screen properly.
Silk Screen - Metallic Colours
Similarly to Neon, Metallic Ink cannot be achieved digitally, which is why I wanted to explore it.
I was lucky to already have my screen set up from the previous experiment. All I had to do was to clean the screen, and print again.


Silk Screen - Printing White
I was lucky to already have my screen set up from the previous experiment. All I had to do was to clean the screen, and print again.

I added a metallic powder (see below) to red and green. This changed the colour quite dramatically, making the colours much richer.

Unfortunately, I didn't take a picture of the powder I added to the ink. However, the picture above illustrates it well. I added gold to the above inks. This gives the prints a speckled sparkle.
Images of Prints

Initial prints using the metallic ink and only one colour. You can see at first, the metallic powder and ink weren't mixed properly.


More examples of prints I produced using the metallic ink, this time using a gradient. I liked how the print worked on black. You cannot see in the image, but the metallic sparkles were much more obvious on black than white.
Silk Screen - Printing White
This process is obviously the same as the above processes, but I found the secret to a good white print is to use a different ratio of binder to ink. To get a much more vivid white, it's best to use more of a 70/30 ratio of ink to binder, as oppose to 50/50. The disadvantage of this is that you have to work a lot quicker with your prints.
